Goals
Few months ago, I worked on automating the tests of user workflows that involve Eclipse tooling. The client organization has more than a hundred of developers and they all use common frameworks based on JEE. They all use the same tools, from source version control to m2e and WTP. Eclipse being their IDE since quite a long time, they decided, some years ago, to automate the installation of Eclipse with preconfigured tools and predefined preferences. They did create their own solution. When OOMPH was released and became Eclipse’s official installer, they quickly dropped their project and adopted OOMPH.
From an OOMPH’s point of view, this organization has its own catalog and custom setup tasks. Unlike what the installer usually shows, there is only one distribution. Everything works behind a proxy. Non-composite p2 repositories are proxyfied by Nexus. All the composite p2 repositories (such as official Eclips’s ones) are mirrored by using Eclipse in command-line. The installer shows a single product, but in different versions (e.g. Neon, Oxygen…). It also provides several projects: several JDKs, several versions of Tomcat, several versions of Maven, several Eclipse tools, etc. We can really say this organization uses all the features OOMPH provides.
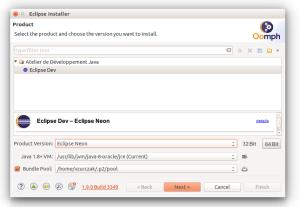
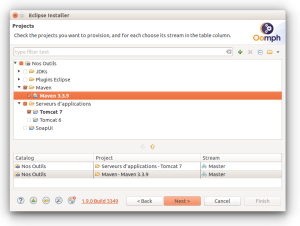
Here is a global overview of what is shown to users.
So, this organization is mostly a group of Eclipse users. Their developments are quite limited. Their focus is about delivering valid Eclipse distributions to their members and verify everything work correctly in their environment. Given this context, my job was to automate things: update sites creation (easy with Tycho), prepare the installer for the internal environement and automate tests that launch the installer, make a real installation, start the newly installed Eclipse, make it execute several actions a real developer would do and verify everything works correctly inside this (restrained / controlled) environment.
Let’s take a look at the various parts.
Automating the creation of Custom Installers
This part is not very complicated.
I created a project on GitHub that shows how it works. Basically, we have a Maven module that invokes ANT. The ANT script downloads the official installer binaries from Eclipse.org. It verifies the checksum, unwrap their content, update the eclipse-inst.ini file, adds predefined preferences (related to the proxy) and rebuilds a package for users. To prevent downloading binaries everytime, we use a local cache (as a directory). If a binary already exists, we verify its checksum against the value provided by Eclipse.org. If it succeeds, it means our cache is valid against Eclipse repositories. Otherwise, it may indicate the cache is invalid and that a newer version was released. In such a situation, we indicate the user he (or she) should retry and/or delete the cache before giving it another try.
Since all of this a Maven project, it is possible to deploy these installers on a Maven repository.
Automating OOMPH tests with SWT Bot
OOMPH is a SWT application.
So, testing it automatically immediately made sense thanks to SWT Bot. Testing with SWT Bot implies deploying it in the tested application. Fortunately, OOMPH is also a RCP application. It means we can install things with p2. That was the first thing to do. And since I enjoy the Maven + ANT combo, I wrote an ANT script for this (inspired from the one available on Eclipse’s wiki – but much more simple). I also made the tasks reusable so that it can also deploy the bundle with the tests to run.
The next step was writing a SWT Bot test and run it against the installer.
The first test was very basic. The real job was launching it. When one wants to run SWT Bot tests, it launches a custom application that itself launches Eclipse. Unfortunately, the usual org.eclipse.swtbot.eclipse.junit.headless.swtbottestapplication application did not work. There are checks in it about the workbench. And even if OOMPH is a RCP and has SWT widgets, it does not have any workbench. This is why I created a custom application I embedded with my SWT Bot test. Once there, everything was ready.
1 – I have a bundle with SWT Bots tests. With a feature. With an update site (that can remain local, no need to deploy it anywhere).
2 – I have an ANT script that can install SWT Bot and my test bundle in OOMPH.
3 – I have an ANT script that can launch my custom SWT Bot application and executes my tests in OOMPH.
It works. The skeleton for the project is available on Github.
Otherwise, the shape and the Maven and ANT settings are the same. I only simplified the tests executed for OOMPH (they would not be meaningful for this article). The main test we wrote deploys Eclipse, but also downloads and unzip specific versions of Maven and Tomcat. Obviously, the catalog is made in such a way that installing these components also updates the preferences so that m2e and WTP can use them.
Notice there are settings in the ANT script that delete user directories (OOMPH puts some resources and information in cache). To make tests reliable, it is better to delete them. This can be annoying if you have other Eclipse installations on your machine. In the end, such tests aim at being executed on a separate infrastructure, e.g. in continuous integration.
Configuring Eclipse for SWT Bot
Once the tests for the installer have run, we have a new Eclipse installation.
And we have other tests to run in it. Just like what we did for OOMPH, we have to install SWT Bot in it. The p2 director will help us once again.
Notice we make this step separated from the execution of the tests themselves.
Testing OOMPH is quite easy. But the tests written for the IDE are much more complicated and we need to be able to re-run them. So, the configuration of the new Eclipse installation is apart from the tests execution.
Writing and Running Tests for Eclipse
In the same manner than for OOMPH, we have a custom plug-in that contains our tests for Eclipse. There is also a feature. and the (same) local update site. This plug-in is deployed along with SWT Bot. Launching the test is almost the same thing than for OOMPH, except there is a workbench here. We can rely on the usual SWT Bot application for Eclipse.
What is more unusual is the kind of test we run here.
I will give you an example. We have a test that…
1. … waits for OOMPH to intialize the workspace (based on the projects selected during the setup – this step is common to all our tests).
2. … opens the SVN perspective
3. … declares a new repository
4. … checks out the last revision
5. … lets m2eclipse import the projects (it is a multi-module project and m2e uses a custom settings.xml)
6. … applies a Maven profile on it
7. … waits for m2eclipse to download (many) artifacts from the organization’s Nexus
8. … waits for the compilation to complete
9. … verifies there is no error on the project
10. … deploys it on the Tomcat server that was installed by OOMPH (through WTP – Run as > Run on Server )
11. … waits for it to be deployed
12. … connects to the new web application (using a POST request)
13. … verifies the content of the page is valid.
This test takes about 5 minutes to run. It implies Eclipse tools, pre-packaged ones too, but also environment solutions (Nexus, SVN server, etc). Unlike what SWT Bot tests usually do, we make integration tests with an environment that is hardly reproductable. It is not just more complex, it must also acknowledge some situations like timeouts or slowlyness. And as usual, there may be glitches in the user interface. As an example, projects resources that are managed by SVN have revision numbers and commit’s author names as a suffix. So, you cannot search resources by full label (hence the TestUtils.findPartialLabel methods). Another example is that when one expands nodes in the SVN hierarchy, it may take some time for the child resources to by retrieved. Etc.
But what was the most complicated was developing these tests.
Iterative Development of these Tests
Usually, SWT Bot tests are developed and tested from the developer’s workspace: right click on the test class, Run as > SWT Bot test. It opens a new workbench and the test runs. That was not possible here. The Eclipse into which the tests must run is supposed to have been configured by OOMPH. You cannot compile the Maven project if you do not have the right settings.xml. You cannot deploy on Tomcat if it has not been declared in the server preferences. And you cannot set these preferences in the test itself because it is part of its job to verify OOMPH did it correctly! Again, it is not unit testing but integration testing. You cannot break the chain.
This is why each test is defined in its own Maven profile.
To run scenario 1, we execute…
mvn clean verify -P scenario1
We also added a profile that recompiles the SWT Bot tests and upgrade the plug-in in the Eclipse installation (the p2 directory can install and uninstall units at once). Therefore, if I modified a test, I can recompile, redeploy and run it by typing in…
mvn clean verify -P recompile-ide-tests -P scenario1
This is far from being perfect, but it made the developement much less painful than going through the full chain on every change.
I wished I could have duplicated preferences from the current workspace when I run tests from Eclipse (even if it is clear other problems would have arisen). We had 4 important scenarios, and each one is managed separately, in the code and in the Maven configuration.
Conclusion
Let’s start with the personal feedback.
I must confess this project was challenging, despite a solid experience with Maven, Tycho and SWT Bot. The OOMPH part was not that hard (I only had to dig in SWT Bot and platform’s code). Testing the IDE itself, with all the involved components and the environment, was more complicated.
Now, the real question is: what is worth the effort?
The answer is globally yes. The good parts are these tests can be run in a continuous integration workflow. That was the idea at the beginning. Even if it is not done (yet), that could (should) be a next step. I have spent quite some time to make these tests robust. I must have run them about a thousand times, if not more. And still sometimes, one can fail due to an environment glitch. This is also why we adopted the profile-per-scenario approach, to ease the construction of a build matrix and be able to validate scenarios separately and/or in parallel. It is also obvious that these tests run faster than by hand. An experienced tester spends about two hours to verify these scenarios manually. A novice will spend a day. Running the automated tests takes at most 30 minutes, provided you can read the docs and execute 5 succeeding Maven commands. And these tests can be declined over several user environments. So, this is globally positive.
Now, there are few drawbacks. We did not go to the continuous integration. For the moment, releases will keep on being managed on-demand / on-schedule (so few times a year). In addition, everything that was done was for Linux systems. There would be minor adaptations to test the process on Windows (mainly, do not launch the same installer). We also found out minor differences between Eclipse versions. SWT Bot intensively uses labels. However, there are labels and buttons that have changed, as an example, between Neon and Oxygen. So, our tests do not work on every Eclipse version. The problem would remain if we tested by hand. Eventually, and unlike what it seems when you read them, the written tests remain complex to maintain. So, short and mid-term benefits might be counter-balanced by a new degree of complexity (easy to use, not so easy to upgrade). Tests by hand take time but remain understandable and manageable by many persons. Writting or updating SWT Bot tests require people to be well-trained and patient (did I mention I run IDE tests at least a thousand times?). Besides, having automated tests does not prevent from tracking tests on TestLink. So, manual tests remain documented and maintained. In fact, not all the tests have been automated, only the main and most painful ones.
Anyway, as usual, progress is made up of several steps. This work was one of them. I hope those facing the same issues will find help in this article and in the associated code samples.


