Hi,
Here is a step-by-step tutorial to explain how to set up your workspace to work on a RCP application hosted on Git and built with Maven + Tycho. Luckily, I have such an application under the hand. It is called Petals Studio and it is available under the EPL license.
This article aims at showing to Petals Studio developers how to configure their Eclipse now we have moved on Git. Besides, it also illustrates the use of several Eclipse tools together, and this can be applied to any RCP application.
Getting the sources
First, get Eclipse (3.7) and install EGit.
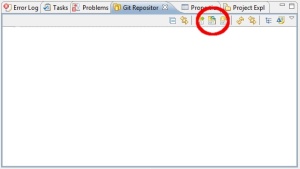
Now, check out the master branch of the studio. Go into Show View > Git Repositories. In the view, click Clone a Git repository…
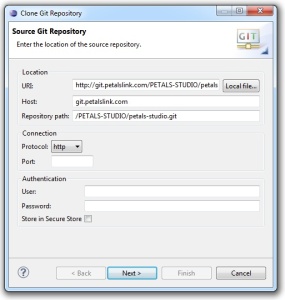
Now, define the location of the remote Git repository and clone it.
Petals Studio is available on Git Hub but also on Petals Link’s Git repository. The creation wizard is straight forward. The checkout is done with the HTTP connection.
You can click Finish here (the next page is useless for the moment).
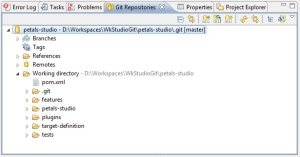
The code repository is cloned on your disk. When it is done, you should see this in the Git Repositories view.
You should recognize the file structure in the working directory. It is the one used to build with Maven and Tycho.
Importing and compiling the projects
It is now time to import the projects.
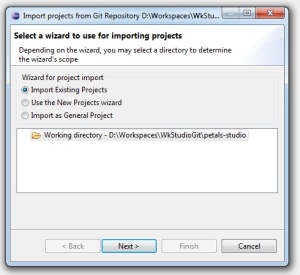
First, right-click the repository (the root) and select Import Projects… Use the Import Existing Projects option and click Next.
You should then see the list of sub-projects to work on: plug-ins, features and test projects. This is to work on them using the PDE (Plug-in Development Environment). Import them all by clicking Finish. We will organize them in working sets later.
The projects are all imported in your workspace, but there should be compile errors. This is because the target platform is not right. Go back in the Git Repositories view, right-click the repository, again, and select Import Projects… Use the Import as General Project option. Make sure the root directory (working directory) is selected and click Next.
On the next page, click Finish.
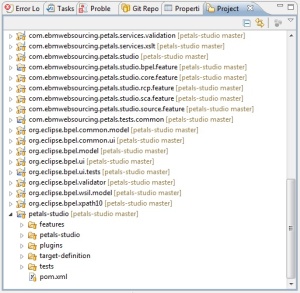
Your workspace should contain projects for the PDE and a general project that contains the entire Maven structure.
We can now configure the target platform.
Go into Window > Preferences and select Plug-in Development > Target Platform. The one to use is named Eclipse 3.7 – Indigo and is located under the target-platform directory of the Maven file structure.
Then, click OK.
Wait some time, until all the plug-ins are brought back on your machine. The error should then have disappeared.
Testing a commit
OK. Let’s now test a commit.
Since we cloned in HTTP, we will not be able to push my modifications. We will have to configure it in SSH, since it is the only approach available for Petals Studio’s repository. This part mainly serves as an example for other RCP applications.
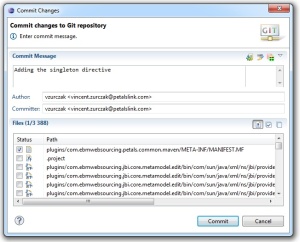
Make some tiny modifications in a project, save the files, right-click the project and select Team > Commit… Enter a short message and click Commit.
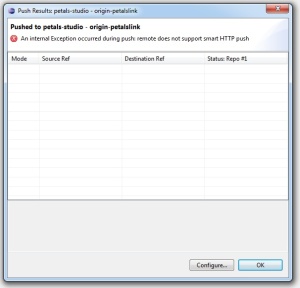
The modifications have been committed in your local repository. It is now time to propagate local commits on the remote (master) branch. In the Git repository, right-click the master branch and select Push to upstream A dialog shows up and indicates an error.
Click Configure…
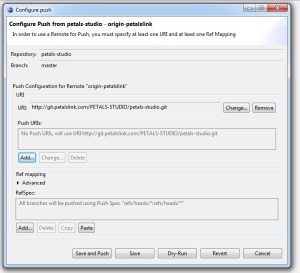
A dialog appears about the push preferences.
Add a new push URI. A second dialog shows up. Type in the SSH configuration and click Finish (committers on Petals Studio, be careful, the right push URI is in fact slightly different).
You should then see your new push URI.
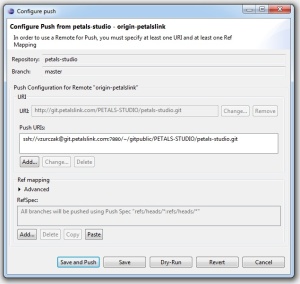
Click Save and push to propagate your work on the remote branch.
Notice that we directly pushed my modifications on the master branch. This is not always what has to be done. It was more about illustrating the use of a push URI which is different from the original repository address. Otherwise, work with branches…
Organizing the projects
For the moment, we have 4 kinds of projects:
- Plug-in projects, used with the PDE.
- Features projects, used with the PDE.
- Tests projects, wich rely on SWT Bot.
- A general project with the entire Maven structure for the build.
To ease the work, it is better to define 3 working sets: one for plug-ins, one for features and one for the tests. The general project can be part of all of them or from none.
Go into a view, like the projects explorer or the package explorer.
In the menu, click Select Working Set… Click New and populate the first working set (I generally use the Java type). Repeat this operation twice until you have the 3 working sets. It may even be a good idea to have a fourth one just for the Tycho / build project.
Use the working sets to filter the projects to display in your project view.
It is then more readable and easier to focus.
And that’s it.
A RCP application can be quite large in terms of projects. Using Tycho simplifies a lot of things but requires a good file hierarchy. And EGit is quite new, which means there is a (little) adaptation period. Making all of these working together is not trivial the first time. So, hopefully, this article will help some people to gain some time on setting up their RCP development environement.







Thank you for that.
If somoeone is interested i a tycho configuration, here is a good starting point: http://alexander.holbreich.org/2012/02/eclipse-tycho-build/